
Introduction
Love the bold, tangy, and spicy kick of Korean food? This Kimchi Recipe brings that authentic flavor straight to your kitchen. Whether you’re a fan of Korean BBQ, bibimbap, or just crave that distinctive fermented crunch, homemade kimchi is a game-changer that transforms every meal into something special.
Learn how to make traditional kimchi at home — crunchy, spicy, and full of probiotics. This isn’t just another fermented vegetable recipe; it’s a cultural staple that has been perfected over thousands of years, and now you can master it in your own kitchen with simple ingredients and straightforward techniques.
After years of studying Korean cooking and working alongside Korean grandmothers who’ve been making kimchi for decades, I’ve perfected a homemade kimchi recipe that captures the true taste of Korea. The secret isn’t just in the ingredients—it’s in understanding the fermentation process, respecting the traditional methods, and knowing how to adjust flavors to create that perfect balance of spicy, salty, tangy, and umami that makes kimchi so addictive.
In this comprehensive guide, you’ll discover everything you need to know about making authentic kimchi recipefrom scratch. We’ll walk through the complete fermentation guide so you understand exactly what’s happening in that jar, provide a detailed ingredient list with substitution options, break down the step-by-step preparation process with visual cues to watch for, share pro tips that only experienced kimchi makers know, and explore flavor variations so you can customize your kimchi adventure.
Whether you’re a complete beginner or looking to refine your technique, this kimchi recipe will become your go-to for authentic Korean flavor.
Table of Contents
Why This Kimchi Recipe Works
This recipe follows traditional Korean methods passed down for generations. Unlike many Western adaptations that skip crucial steps or substitute ingredients that fundamentally change the flavor profile, this kimchi recipe respects the time-honored techniques that Korean families have used for centuries. The salting process, the fermentation timeline, and the balance of ingredients all follow traditional guidelines that ensure your kimchi tastes just like what you’d find in Seoul.
Kimchi is rich in probiotics, vitamins, and antioxidants. Each spoonful contains beneficial bacteria that support digestive health, boost immunity, and promote overall wellness.
The fermentation process creates lactobacillus bacteria, the same probiotic found in yogurt and other fermented foods. Additionally, kimchi recipe is packed with vitamins A, B, and C, along with powerful antioxidants that help fight inflammation. The garlic and ginger add anti-microbial properties, while the napa cabbage provides fiber and nutrients. This means you’re not just eating something delicious—you’re nourishing your body with every bite.
Perfect as a side dish, in fried rice, ramen, or Korean BBQ spreads. Kimchi’s versatility is one of its greatest strengths. Traditionally served as a banchan (side dish) alongside rice and soup, kimchi recipe has found its way into countless dishes across Korean cuisine and beyond.
Use it to add depth to stews like kimchi recipe jjigae, stir it into fried rice for an instant flavor upgrade, top your ramen for extra punch, or serve it alongside grilled meats to cut through richness with its tangy heat.
You can easily adjust the spice level or ingredients to suit your taste. Not a fan of extreme heat? Simply reduce the gochugaru. Want it spicier? Add more red pepper flakes or even fresh chili peppers. Need a vegan version? We’ve got you covered with fish sauce alternatives. Prefer less fermentation? Eat it fresh. Want it funky? Let it ferment longer. This recipe provides the foundation, but you’re the chef who decides the final flavor profile.
Essential Ingredients for Kimchi Recipe
| Ingredient | Quantity | Purpose |
|---|---|---|
| Napa cabbage | 1 large head (about 2 lbs) | Base of the kimchi |
| Korean coarse sea salt | ½ cup | Draws out moisture and preserves crunch |
| Water | As needed | For soaking cabbage |
| Korean red pepper flakes (gochugaru) | ½–1 cup | Signature heat and color |
| Garlic | 5–6 cloves | Deep, aromatic flavor |
| Ginger | 1-inch piece | Warm, spicy undertone |
| Fish sauce or salted shrimp | 2–3 tbsp | Traditional umami depth |
| Sugar | 1 tsp | Balances spice and acidity |
| Green onions | 4–5 stalks | Freshness and aroma |
| Carrot (julienned) | 1 medium | Adds crunch and color |
| Radish (optional) | 1 small | Traditional texture enhancer |
Ingredient Tips
Use gochugaru, not chili powder: This is perhaps the most critical ingredient tip for authentic kimchi recipe . Gochugaru is Korean red pepper flakes made from sun-dried Korean red chili peppers. It has a unique flavor profile that’s simultaneously fruity, smoky, and mildly spicy—completely different from the sharp, one-dimensional heat of regular chili powder or cayenne pepper.
Gochugaru also has a coarser texture and vibrant red color that gives kimchi its signature appearance. Regular chili powder will make your kimchi taste like Mexican food rather than Korean cuisine, so it’s worth seeking out authentic gochugaru at Korean markets or online.
Salt carefully: The salting process is crucial for proper fermentation and texture. Too little salt, and the cabbage won’t release enough moisture, leading to poor fermentation and potential spoilage.
The cabbage might also remain too firm or develop off-flavors. Too much salt, and your kimchi recipe becomes overly salty, which not only tastes unpleasant but also inhibits the beneficial bacteria needed for fermentation. Use coarse sea salt rather than table salt, as the mineral content and grain size affect how the salt interacts with the cabbage. When in doubt, err slightly on the side of less salt—you can always add more to the paste, but you can’t take it away once the cabbage is brined.
Fish sauce alternatives: Traditional kimchi recipe includes fish sauce or salted shrimp (saeujeot) for umami depth, but vegetarian and vegan versions are completely authentic in Korean Buddhist temple cuisine. Replace fish sauce with soy sauce for a similar salty umami note, or use miso paste for a deeper, fermented complexity.
Some recipes use kombu (kelp) broth for oceanic flavor without the fish. You can also simply omit it and increase the salt slightly, though the flavor will be somewhat lighter. The fermentation process itself creates umami compounds, so vegan kimchi is still delicious and complex.
Step-by-Step Instructions
1. Prep the Cabbage
Begin by selecting a fresh, heavy napa cabbage with tightly packed, crisp leaves. Cut the cabbage lengthwise into quarters by slicing through the core, then use your hands to gently pull the quarters apart to maintain the leaf structure. In a large bowl or clean sink, dissolve the coarse sea salt in enough water to submerge the cabbage quarters. Soak the cabbage in this salted water for 2–3 hours, turning every 30 minutes to ensure even salting.
The cabbage is ready when the leaves are wilted and bendable without breaking, and the thickest parts of the stems feel slightly softened. This process draws out excess water, concentrates the cabbage flavor, and creates the perfect texture for fermentation. After soaking, rinse the cabbage thoroughly under cold running water at least three times to remove excess salt.
Taste a piece of the thick white stem—it should taste lightly salted, like a pleasantly seasoned vegetable, not overly salty. Drain the cabbage completely by placing it in a colander cut-side down for at least 30 minutes, allowing gravity to pull out remaining water.
2. Make the Kimchi Paste
While the cabbage drains, prepare the flavor paste that gives kimchi recipe its distinctive character. Peel and mince the garlic cloves finely, or use a garlic press for convenience. Peel the ginger and grate it on a fine grater or mince it into tiny pieces. In a large mixing bowl, combine the minced garlic, grated ginger, fish sauce, and sugar. Stir these ingredients together until the sugar dissolves.
Add the gochugaru gradually, starting with ½ cup if you prefer mild to medium heat, or up to 1 cup for traditional spicy kimchi recipe . Mix thoroughly—the paste should be thick and brick-red, with a consistency somewhere between wet sand and loose mud. Add the julienned carrots, chopped green onions (cut into 1-inch pieces), and julienned radish if using. Stir everything together until the vegetables are evenly coated with the red pepper mixture. The paste should be aromatic, spicy to the nose, and vibrant in color. This is your kimchi’s flavor foundation.
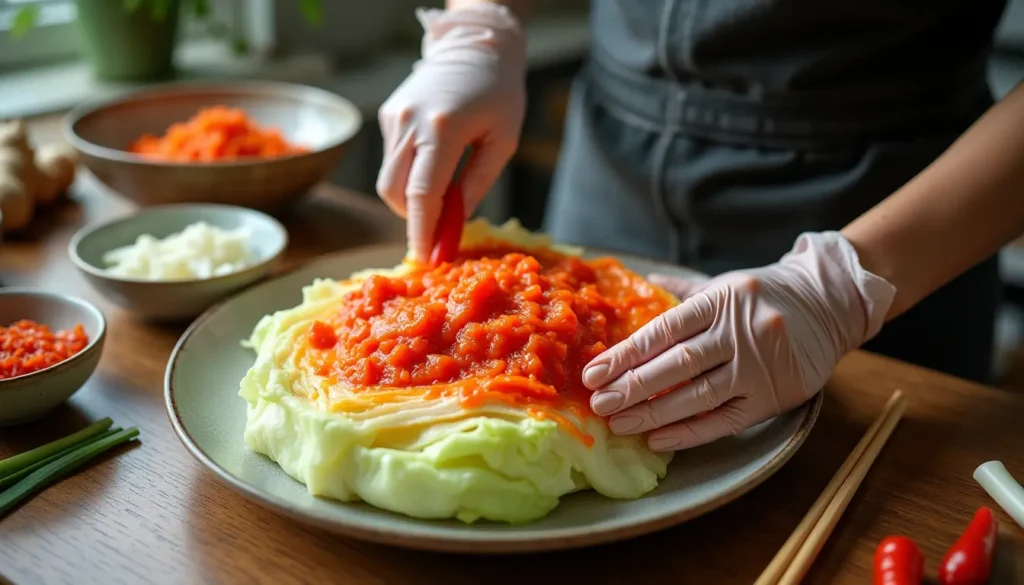
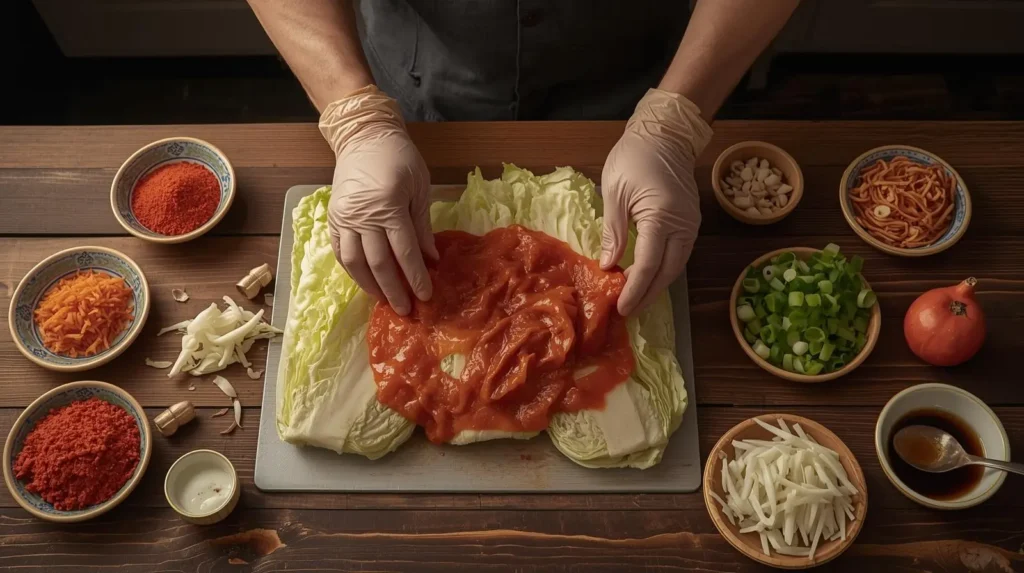
3. Mix the Kimchi
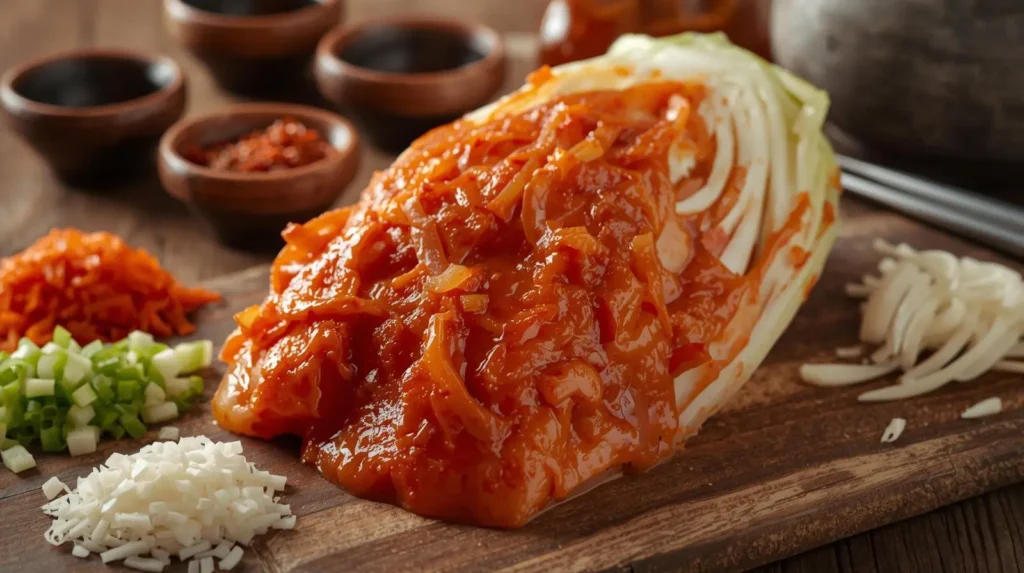
This is where the magic happens, but it’s also messy work. Wearing food-safe gloves is essential—gochugaru can irritate skin and the oils will stain your hands red for days without protection. Take one cabbage quarter at a time and separate the leaves slightly, like opening a book. Using your gloved hands, take generous amounts of the kimchi recipe paste and spread it between each cabbage leaf, coating both sides thoroughly.
Massage the paste into the leaves, working from the outer leaves toward the center, ensuring even coverage throughout the entire quarter. Pay special attention to the thick white stems, as they need more paste to absorb flavor. Don’t be shy with the paste—you want every bite of kimchi recipe to be flavorful. The massaging action helps the paste penetrate the cabbage and begins the flavor infusion process. Repeat this process with each cabbage quarter until all are completely coated.
4. Pack and Ferment
Choose a clean glass jar or fermentation crock with a wide mouth for easy packing and access. Glass is ideal because it doesn’t react with the acidic fermentation, allows you to see the fermentation progress, and doesn’t retain odors. Avoid metal containers, as they can react with the acids and salt.
Take one coated cabbage quarter and roll it tightly from the leafy end toward the stem, creating a compact bundle. Place it into the jar cut-side up. Press down firmly to remove air bubbles, which can cause uneven fermentation or spoilage. Repeat with remaining cabbage quarters, packing them tightly into the jar. The cabbage should be compressed enough that liquid begins to pool around it. If there’s any remaining paste in your mixing bowl, spoon it over the top of the packed kimchi recipe .
Leave approximately 1 inch of headspace at the top of the jar, as the fermentation process produces gases and liquid that need room to expand. Seal the jar loosely—you want a lid that keeps contaminants out but allows fermentation gases to escape. If you seal it too tightly, pressure can build up and cause the jar to leak or even crack.
5. Fermentation Time
Place the jar on a plate or tray to catch any liquid that may overflow during active fermentation. Let the jar sit at room temperature (around 65-75°F) for 1–2 days, depending on the ambient temperature and your taste preference. In warmer weather or warmer rooms, fermentation happens faster—sometimes within 24 hours. In cooler temperatures, it may take 2-3 days to reach the same level of tanginess.
During fermentation, you’ll notice bubbles forming, liquid rising, and a distinctive fermented smell developing. This is completely normal and indicates active fermentation. After the first 24 hours, begin tasting your kimchi recipe daily by pressing down the vegetables to release some liquid and tasting a small piece. Fresh kimchi is crunchy and bright with more raw vegetable flavor. As it ferments, the flavor becomes tangier, more complex, and develops that characteristic funky depth.
Once the kimchi reaches your desired level of tanginess—typically when it has a pleasant sour note that balances the spice and salt—transfer it to the refrigerator. Cold temperatures slow fermentation dramatically, though it continues at a much gentler pace. This is when kimchi enters its “eating prime,” though it will continue to develop character for months in the fridge.

Pro Tips for the Perfect Kimchi Recipe
Temperature Control: Understanding temperature is the key to consistent kimchi recipe . Warm temperatures (75-80°F) speed up fermentation significantly, producing tangy kimchi in as little as 1 day but also increasing the risk of over-fermentation if you’re not careful.
Cool temperatures (60-65°F) slow fermentation down, giving you more control and producing a more gradual flavor development. In winter, Korean families traditionally made kimchi to ferment slowly in cool storage rooms or buried clay pots. In modern kitchens, you can control fermentation by choosing where you place your jar—near a warm stove or heater for faster fermentation, or in a cooler spot for slower development.
Use Clean Tools: Fermentation is a controlled bacterial process, and you want only the good bacteria (lactobacillus) to thrive. Sterilize your jars, bowls, and utensils before starting. Wash your hands thoroughly. Any competing bacteria can cause off-flavors, strange smells, or even spoilage. That said, don’t be overly paranoid—kimchi recipe is quite robust due to its salt content and acidic environment. Just maintain basic cleanliness and avoid introducing obvious contaminants.
Taste Test: The beauty of homemade kimchi is that you control the final flavor. Open your jar and taste daily after the first day to find your preferred flavor balance. Some people love fresh, barely fermented kimchi with maximum crunch and brightness. Others prefer deeply fermented, funky kimchi with complex sour notes. There’s no wrong answer—it’s personal preference. Use a clean fork or spoon each time you taste, and press down the cabbage after opening to keep it submerged in liquid.
Flavor Variations
Baechu Kimchi: This is the classic napa cabbage version you’ve just learned—the most recognizable and popular kimchi recipe variety. It’s what most people picture when they think of kimchi, and it’s the version served at nearly every Korean meal. The combination of tender napa cabbage leaves with spicy, garlicky paste creates the perfect balance of texture and flavor.
Kkakdugi: Cubed radish kimchi is a must-try for crunch lovers and those who prefer a different texture profile. Made with Korean radish (mu) cut into bite-sized cubes and seasoned similarly to baechu kimchi recipe , kkakdugi has a crisp, refreshing bite that’s especially satisfying. The radish cubes maintain their crunch even after fermentation, and the flavor is slightly sweeter and less pungent than cabbage kimchi. It’s particularly popular as a side dish with noodle soups and stews.
Oi Sobagi: Stuffed cucumber kimchi is fresh, spicy, and perfect for summer. Small pickling cucumbers are scored lengthwise and stuffed with kimchi paste, then fermented for a shorter time than cabbage kimchi recipe . The result is refreshing, crunchy, and intensely flavorful. Because cucumbers have high water content, oi sobagi ferments faster and should be eaten within a week or two for optimal texture.
Vegan Kimchi: Traditional temple cuisine in Korea has perfected vegan kimchi recipes that are just as flavorful as their fish sauce-containing counterparts. Skip the fish sauce and use a combination of soy sauce and kelp broth for umami depth. Some recipes include ground shiitake mushrooms for an earthy, savory note. Miso paste also works beautifully, adding fermented complexity without animal products. The fermentation process creates its own umami compounds, so vegan kimchi recipe develops a rich, satisfying flavor profile all on its own.
How to Serve Kimchi
As a Side Dish: The traditional way to enjoy kimchi is as a banchan alongside rice, soup, and other dishes. Korean meals typically include multiple small side dishes, and kimchi recipe is always present. Serve it in a small dish with rice and your main course—the tangy, spicy kimchi cuts through rich flavors and refreshes the palate between bites. It’s equally at home next to grilled meats, fish, or simple vegetable dishes.
In Recipes: Kimchi is an ingredient powerhouse that transforms ordinary dishes into something extraordinary. Add it to fried rice for instant flavor and texture—kimchi bokkeumbap is a Korean comfort food classic. Stir it into soups and stews like kimchi jjigae (kimchi stew) or budae jjigae (army stew). Make kimchi pancakes (kimchi jeon) by mixing chopped kimchi recipe into savory pancake batter. Use it in dumplings, on pizza, in grain bowls, or anywhere you want a hit of tangy, spicy, fermented flavor.
With Eggs: The combination of kimchi and eggs is breakfast perfection. Try kimchi scrambled eggs for a quick, protein-packed meal with a Korean twist. Make a kimchi omelet by folding chopped kimchi recipe into beaten eggs with cheese. Top fried eggs with a spoonful of kimchi for a simple but transformative breakfast. The richness of eggs and the acidic spice of kimchi create a beautiful balance that’s become popular worldwide.
Fusion Dishes: Modern chefs have embraced kimchi’s versatility, incorporating it into fusion dishes that bridge cultures. Kimchi tacos combine Korean flavors with Mexican street food—think spicy pork or beef topped with kimchi and cilantro in a corn tortilla. Kimchi quesadillas blend melted cheese with tangy kimchi for a spicy, gooey treat. Kimchi grilled cheese has become a cult favorite, with the fermented cabbage adding complexity to the classic comfort food. Other creative uses include kimchi recipe burgers, kimchi pasta, kimchi potato salad, and even kimchi Bloody Marys.
FAQs
“How long should kimchi ferment?”
Typically 1–2 days at room temperature, then refrigerated for ongoing flavor development. However, fermentation time depends entirely on your taste preference and ambient temperature. In warm weather (75-80°F), kimchi recipe can reach a tangy, fermented flavor in just 24 hours. In cooler conditions (60-65°F), it might take 3-4 days to reach the same level.
Start tasting after 24 hours and check daily until it reaches your preferred tanginess. Remember that refrigeration slows but doesn’t stop fermentation, so kimchi continues to develop more complex, sour flavors over weeks and months in the fridge. Many Korean families prefer kimchi that’s been fermenting in the refrigerator for several weeks, as the flavor deepens and mellows.
“Can I make kimchi without fish sauce?”
Absolutely—replace it with soy sauce or miso for a vegan version that’s completely authentic to Korean Buddhist temple cuisine. Traditionally, Korean monks and nuns have made kimchi without animal products for centuries, so vegan kimchi recipe has deep historical roots. Use 2-3 tablespoons of soy sauce for salty umami, or mix 1-2 tablespoons of miso paste with a little water for a fermented depth that mimics fish sauce’s complexity.
Some recipes use kelp or shiitake mushroom broth for additional savory flavor. The fermentation process itself generates umami compounds through the breakdown of proteins, so even without fish sauce, your kimchi will develop a rich, satisfying taste.
“Why is my kimchi too sour?”
It fermented too long at a warm temperature—refrigerate sooner next time to catch it at your preferred stage. Over-fermented kimchi becomes increasingly sour and softer in texture as the bacteria continue breaking down sugars and vegetables. While this isn’t dangerous (fermentation is actually preserving the food), it may be more sour than you enjoy eating fresh.
The good news is that over-fermented kimchi is perfect for cooking—Korean cooks specifically seek out old, sour kimchi recipe for making kimchi jjigae (stew) and kimchi fried rice, as the intense flavor adds incredible depth to cooked dishes. To prevent this in the future, taste your kimchi daily during room temperature fermentation and move it to the refrigerator as soon as it reaches your preferred tanginess.
“Can I eat kimchi right away?”
Yes, but it tastes best after at least 1 day of fermentation. Freshly made kimchi (sometimes called “fresh kimchi” or “unfermented kimchi”) has a bright, raw vegetable flavor with spicy heat from the gochugaru. It’s crunchy, peppery, and garlicky—pleasant, but missing the complex, tangy depth that fermentation brings. After just 24 hours of fermentation, the flavor transforms as beneficial bacteria begin their work, producing lactic acid and other flavor compounds that create kimchi’s signature taste. Most people prefer kimchi after 1-3 days of fermentation, when it strikes a balance between fresh crunch and fermented tang. Experiment to find your sweet spot.
Conclusion
This Authentic Kimchi Recipe delivers all the spice, crunch, and probiotic goodness of traditional Korean cuisine, bringing a taste of Korea to your home kitchen. You’ve learned the time-honored techniques that create perfectly fermented kimchi—from properly salting the cabbage to crafting the ideal flavor paste, from packing your jar for optimal fermentation to understanding how temperature and time affect the final result. These are skills that Korean families have passed down through generations, and now they’re yours to practice and perfect.
Making kimchi at home connects you to an ancient culinary tradition while providing your body with beneficial probiotics and your meals with explosive flavor. Whether you eat it fresh and crunchy after one day or deeply fermented and tangy after several weeks, whether you serve it as a traditional side dish or incorporate it into creative fusion recipes, homemade kimchi adds a dimension of flavor that store-bought versions simply can’t match. You control the spice level, the fermentation time, and every ingredient that goes into your jar.
Try making your own kimchi today—it’s easier than you think and adds a burst of flavor to every meal! The initial time investment of 3-4 hours (mostly hands-off soaking time) yields weeks of delicious, probiotic-rich kimchi that elevates everything from simple rice bowls to elaborate dinner spreads. Once you taste the difference between homemade and store-bought kimchi, you’ll understand why so many people become obsessed with fermenting their own. Start with this basic recipe, then experiment with variations, spice levels, and fermentation times until you develop your signature kimchi style.
Next, check out our Hibachi Recipe Blackstone or Instant Pot Rice Recipe for perfect pairings that complement kimchi’s bold flavors. Kimchi deserves to be served alongside equally delicious dishes—try it with hibachi-style vegetables and fried rice, or use your perfectly cooked Instant Pot rice as a neutral base that lets kimchi’s complex flavors shine. The combination of fluffy rice, savory hibachi dishes, and tangy, spicy kimchi creates a balanced meal that’s both satisfying and exciting. Your Korean-inspired cooking journey has just begun, and each recipe you master opens up new possibilities for flavor combinations and creative meals.
How did you find results our recipes
There are no reviews yet. Be the first one to write one.

