
Table of Contents
Introduction
Tired of lumpy, bland gravy that looks more like wallpaper paste than the rich, velvety sauce you see in restaurants? This beef broth gravy recipe transforms simple pantry ingredients into a silky, deeply flavorful gravy that elevates every dish it touches. No more broken sauces, no more flour clumps – just smooth, restaurant-quality gravy that your family will rave about.
This foolproof beef broth gravy delivers the perfect balance of rich beef flavor and creamy texture that clings beautifully to mashed potatoes, coats roast beef like velvet, and turns simple weeknight meals into memorable comfort food experiences. Every spoonful provides that satisfying, soul-warming richness that makes gravy the star of any meal.
As someone who’s spent over 15 years perfecting sauce-making techniques in both professional and home kitchens, I’ve refined this beef broth gravy recipe to be absolutely foolproof. You’ll never again worry about lumps, breaking, or bland flavor – this method guarantees smooth, flavorful results every single time.
In this comprehensive guide, you’ll master the essential techniques for creating perfect beef broth gravy, discover the best ingredients and equipment for optimal results, learn troubleshooting tips for common gravy problems, and explore creative variations that will keep your family excited about this classic sauce.
Why This Beef broth gravy Works
This beef broth gravy recipe has become the gold standard in thousands of kitchens because it solves the three biggest gravy-making challenges: consistency, flavor, and reliability.
- Uses simple, affordable pantry ingredients – Quality beef broth, butter, flour, and basic seasonings create restaurant-quality results without specialty items
- Foolproof roux method prevents lumps – The proper fat-to-flour ratio and whisking technique ensures silky smoothness every time
- Ready in just 15 minutes – Perfect timing when you’re coordinating multiple dishes for holiday meals or Sunday dinners
- Naturally rich and savory – Beef broth provides deep umami flavor that doesn’t require artificial enhancers or complicated reductions
- Scales easily for any crowd – Double, triple, or halve the recipe without affecting quality or technique
- Make-ahead friendly – Prepare components in advance and finish quickly when serving time arrives
Choosing the Right Beef broth gravy
The foundation of exceptional beef broth gravy lies in selecting high-quality broth that provides the deep, savory flavor your gravy deserves.
Best Broth Options for This Recipe Beef broth gravy
Low-sodium beef broth is the gold standard for homemade gravy. The reduced salt content allows you to control seasoning precisely while concentrating the beef flavor. Look for brands with rich, dark color and minimal ingredients – avoid broths with artificial flavors or excessive additives.
Bone broth delivers superior richness and body due to the natural gelatin extracted during long cooking processes. This creates gravy with luxurious mouthfeel and enhanced nutritional value, though it typically costs more than regular broth.
Beef stock works beautifully when diluted slightly, as it’s often more concentrated than broth. The deeper flavor profile creates incredibly robust gravy that stands up to hearty meats and rich sides.
Buying Tips
Look for broth with deep amber or brown coloring – pale broths often lack the robust flavor needed for outstanding gravy. Read ingredient lists carefully and choose options with beef, vegetables, and herbs as primary components rather than artificial flavoring.
Ask your butcher about locally-made bone broths or stocks, which often provide superior flavor compared to mass-produced options. Many butcher shops make their own from quality beef bones and aromatic vegetables.
Substitutions
Swap beef broth for mushroom broth to create vegetarian gravy with deep umami flavor. Chicken broth works in a pinch but will produce lighter-colored, milder-flavored gravy. For richer results, mix equal parts broth and dry red wine, cooking off the alcohol before adding to your roux.
Ingredients & Prep Beef broth gravy
Essential Gravy Components
Fat Base: Butter provides the best flavor and texture for beef broth gravy, though you can substitute beef drippings from roasted meats for even richer results. The fat should be fresh and high-quality – rancid fats will ruin your gravy’s flavor.
Thickening Agent: All-purpose flour creates the perfect consistency and neutral flavor. Measure flour carefully – too little results in thin gravy, while too much creates a pasty texture that coats your mouth unpleasantly.
Liquid Foundation: Room temperature or slightly warm broth incorporates more smoothly than cold liquid, preventing temperature shock that can cause breaking or lumping.
Flavor Enhancement Ingredients
Aromatics and Seasonings:
- 1 small shallot, finely minced (optional but recommended)
- 2 cloves garlic, minced (optional)
- 1 teaspoon fresh thyme leaves or ½ teaspoon dried
- ½ teaspoon freshly ground black pepper
- Salt to taste (add gradually)
- 1 tablespoon Worcestershire sauce for depth
Optional Enhancements:
- 2 tablespoons dry sherry or red wine for complexity
- 1 teaspoon tomato paste for color and umami
- Fresh herbs like rosemary or sage for seasonal variation
Pantry Staples
Keep these essentials stocked for spontaneous gravy-making:
- High-quality unsalted butter for controlling salt content
- Fresh all-purpose flour (check expiration dates)
- Quality beef broth in shelf-stable containers
- Worcestershire sauce and soy sauce for umami enhancement
- Fresh or dried herbs for flavor complexity
Step-by-Step Cooking Instructions
Pre-Cooking Prep Beef broth gravy
Measure all ingredients before you begin – gravy-making moves quickly once started, and proper mise en place prevents disasters. Bring beef broth to room temperature or warm it slightly in the microwave to prevent temperature shock when adding to your roux.
Have a fine-mesh whisk ready and clear workspace around your cooking area. If making gravy from pan drippings, strain and measure the drippings first, adding butter as needed to reach the required fat amount.
Creating the Perfect Roux
Step 1: Heat the Fat Melt 4 tablespoons butter in heavy-bottomed saucepan over medium heat. The pan should be large enough to accommodate vigorous whisking without splashing. Avoid high heat, which can burn the butter and create bitter flavors.
Step 2: Add Flour Gradually Sprinkle 4 tablespoons flour over melted butter while whisking constantly. Continue whisking for 2-3 minutes until mixture becomes smooth and bubbles actively. This cooking step eliminates raw flour taste while creating the foundation for smooth gravy.
Step 3: Cook the Roux Continue cooking while whisking for 3-5 minutes until mixture turns light golden brown and develops a nutty aroma. This blonde roux provides the perfect balance of thickening power and flavor development.
Adding Liquid and Finishing
Step 4: Incorporate Broth Slowly Remove pan from heat temporarily and add ½ cup warm beef broth while whisking vigorously. The mixture will bubble and thicken immediately. Return to medium heat and gradually add remaining 2½ cups broth, whisking constantly to prevent lumps.
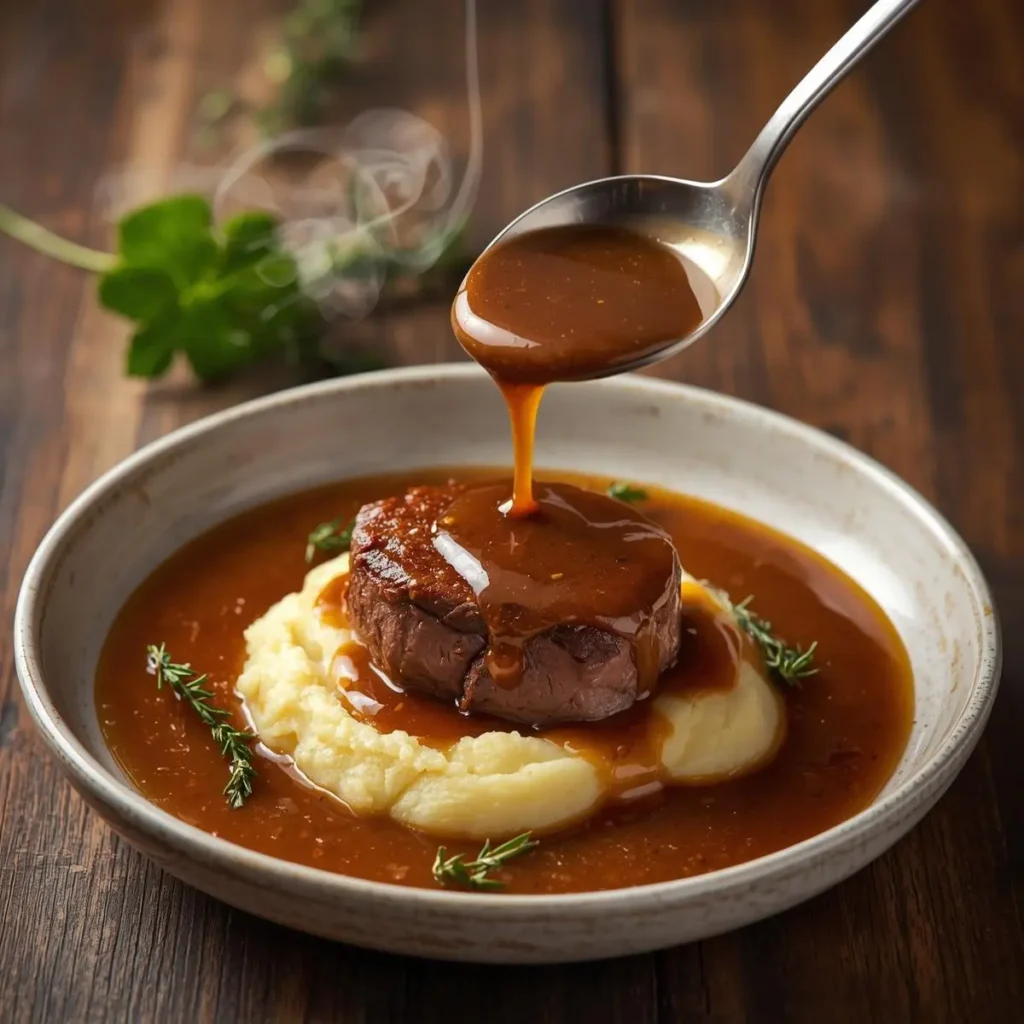
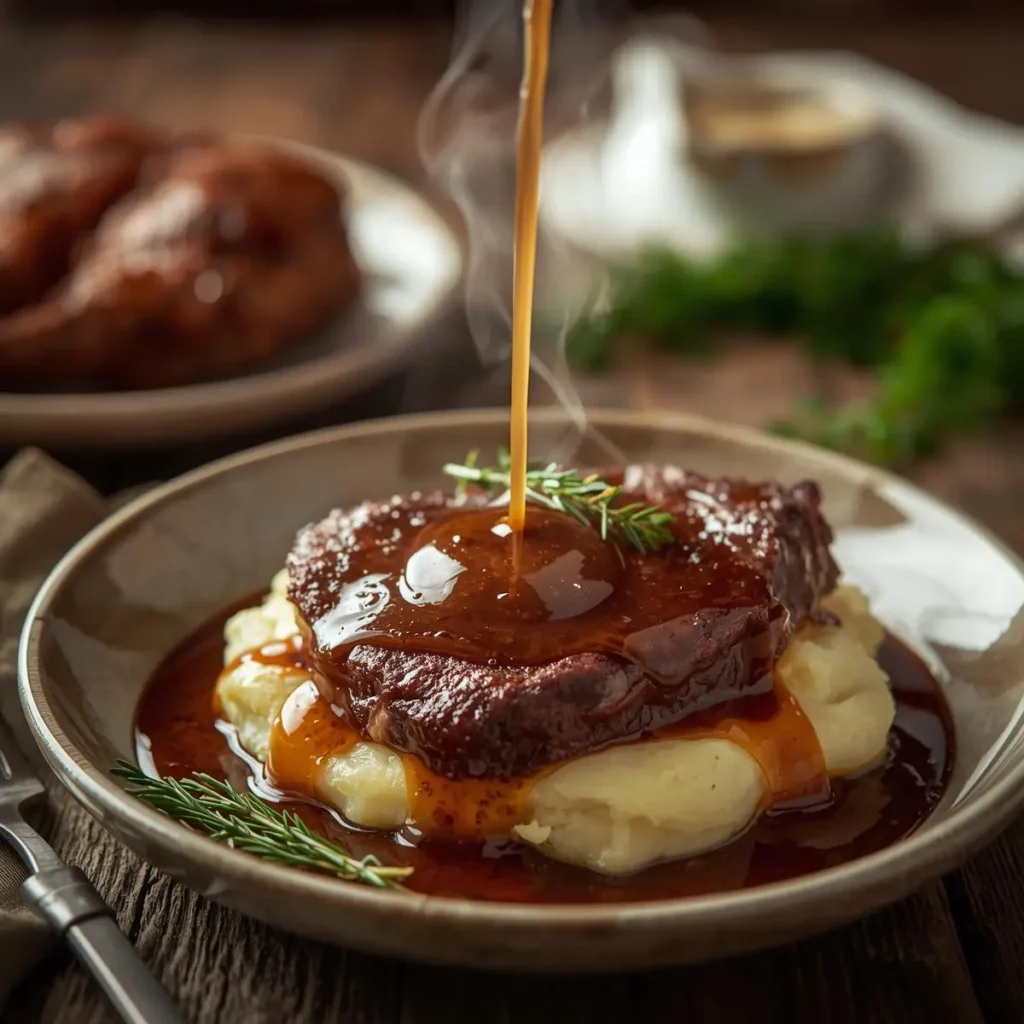
Step 5: Simmer and Season Bring gravy to gentle simmer, whisking frequently. Cook 5-8 minutes until thickened to desired consistency – it should coat the back of a spoon but pour easily. Season with salt, pepper, and Worcestershire sauce, tasting and adjusting as needed.
Final Consistency Check
Perfect beef broth gravy should coat a spoon lightly but pour in a steady stream. If too thick, thin with additional warm broth. If too thin, simmer longer to reduce, or create a slurry with 1 tablespoon flour mixed with 2 tablespoons cold broth, then whisk into simmering gravy.
Pro Tips for Perfect Beef Broth Gravy
Avoiding Common Gravy Disasters
Prevent lumps at all costs by maintaining constant whisking motion when adding liquid. If lumps form despite your best efforts, strain gravy through fine-mesh sieve or use immersion blender to smooth out texture quickly.
Control your heat carefully – medium heat prevents burning while allowing proper roux development. High heat can cause butter to separate or flour to burn, creating bitter flavors and broken texture.
Taste and adjust gradually – Start with less seasoning and build up slowly. Remember that gravy will concentrate slightly as it reduces, intensifying flavors over time.
Tool Recommendations
Heavy-bottomed saucepan – Distributes heat evenly and prevents hot spots that can burn your roux. Stainless steel or enameled cast iron work best for temperature control.
Fine-mesh whisk – Essential for smooth incorporation and preventing lumps. Ball whisks work particularly well for gravy-making due to their efficient mixing action.
Fine-mesh strainer – Your insurance policy against lumps. Keep one nearby for emergency smoothing if needed.
Storage & Reheating
Refrigerator: Store cooled gravy in airtight containers for up to 4 days. Place plastic wrap directly on surface to prevent skin formation, then cover container tightly.
Freezer: Freeze in ice cube trays for portion control, then transfer to freezer bags for up to 3 months. This method allows you to thaw exactly what you need.
Reheating: Warm gently over low heat, whisking frequently and adding warm broth if needed to restore consistency. Avoid high heat, which can cause breaking or scorching.
Flavor Variations
Herb-Enhanced Gravy
Transform your beef broth gravy into an elegant sauce by incorporating fresh herbs during the final minutes of cooking. Add 1 tablespoon each of chopped fresh thyme, rosemary, and sage for a holiday-worthy variation that pairs beautifully with roasted meats. The herbs should be added off heat to preserve their bright flavor and color.
For a French-inspired twist, stir in 2 tablespoons fresh chopped parsley and 1 teaspoon dried tarragon just before serving. This creates a sophisticated flavor profile reminiscent of classic French pan sauces.
Wine-Enriched Version
Elevate your beef broth gravy by incorporating dry red wine or sherry for complex, restaurant-quality depth. Replace ½ cup of the beef broth with dry red wine, adding it after the roux stage and simmering to cook off the alcohol completely. This creates rich, nuanced flavor that complements beef dishes perfectly.
White wine or dry sherry work beautifully too, creating lighter, more elegant gravies suitable for poultry or pork dishes.
Global Flavor Adaptations
Asian-Inspired: Add 1 tablespoon soy sauce, 1 teaspoon fresh grated ginger, and a pinch of five-spice powder for an East-meets-West fusion that complements grilled meats beautifully.
Mediterranean Style: Incorporate 1 tablespoon tomato paste, 1 teaspoon dried oregano, and finish with a splash of red wine vinegar for bright, herbaceous notes.
Smoky Southern Style: Add 1 teaspoon smoked paprika and a dash of hot sauce for gravy that pairs perfectly with fried chicken or country ham.
Serving Suggestions
The versatility of this beef broth gravy makes it the perfect complement to countless comfort food classics and elegant dinner presentations alike.
Classic Pairings:
- Creamy mashed potatoes – the ultimate comfort food combination
- Roast beef or prime rib for special occasion elegance
- Meatloaf and mashed cauliflower for hearty family dinners
- Yorkshire pudding or popovers for traditional British-style meals
Creative Applications:
- Poutine base for Canadian-inspired comfort food
- Sauce for beef and mushroom skillet meals
- Topping for open-faced hot beef sandwiches
- Base for beef pot pie filling
Side Dish Enhancements: Pour over roasted root vegetables like carrots, parsnips, and turnips to transform simple sides into restaurant-quality accompaniments. The rich gravy adds moisture and flavor that makes vegetables irresistible even to picky eaters.
Beverage Pairings: Full-bodied red wines like Cabernet Sauvignon or Merlot complement the rich beef flavors beautifully. For beer lovers, try dark ales, porters, or stouts. Non-alcoholic options include rich fruit juices like grape or pomegranate juice, which echo the wine notes without alcohol.
FAQs
Can I make this gravy ahead of time? Absolutely! Prepare the Beef broth gravy completely, then cool and refrigerate for up to 3 days. Reheat gently while whisking, adding warm broth as needed to restore consistency. The flavors actually improve overnight as they meld together.
What if my gravy is too salty? Add a peeled potato cut in half and simmer for 10 minutes – the potato will absorb excess salt. Remove before serving. Alternatively, add a splash of cream or increase the broth to dilute saltiness.
How do I fix lumpy gravy? Strain through fine-mesh sieve, pressing solids with spoon back, or use an immersion blender directly in the pan. For stubborn lumps, blend in batches in regular blender, then return to pan and reheat.
Can I use this recipe with pan drippings? Yes! Strain pan drippings and measure – you need 4 tablespoons fat total. Add butter if drippings don’t provide enough fat, then follow the recipe as written, using the flavorful drippings as part of your fat base.
Why did my gravy separate or break? Usually caused by too high heat or adding cold liquid too quickly. To fix, remove from heat and whisk in 1-2 tablespoons cold butter or cream. If that doesn’t work, start over with new roux and gradually whisk in the broken gravy.
Can I make this gluten-free? Yes! Substitute equal amounts of rice flour, cornstarch, or gluten-free flour blend for regular flour. The technique remains the same, though you may need to simmer slightly longer for full thickening.
Conclusion
This beef broth gravy recipe proves that restaurant-quality sauces are absolutely achievable in your home kitchen with the right technique and quality ingredients. The rich, velvety texture and deep beef flavor will transform ordinary meals into memorable dining experiences that your family will request again and again.
Master this technique tonight and watch how a perfect gravy elevates every dish it touches! Your guests will be amazed at the professional quality you can achieve with such simple ingredients and straightforward methods.
Join the thousands of home cooks who have made this their go-to gravy recipe for everything from weeknight dinners to holiday feasts. Once you experience the confidence that comes with mastering this fundamental sauce, you’ll find yourself looking forward to gravy-making rather than dreading it.
Ready to expand your sauce repertoire? Try our Classic Brown Butter Sauce Recipe or explore our Complete Guide to Pan Sauces – both use similar techniques and will give you even more ways to elevate your cooking with spectacular homemade sauces!
How did you find results our recipes
There are no reviews yet. Be the first one to write one.